|
4 / 5 Wire Resistive
Touch Screens & Controllers Updated November 4, 2021
What is this FAQ for? Based on information requested by customers,
this FAQ is designed to cover issues relating to the 4 / 5 wire
Resistive Touch Screens and Controllers (SLT-TP05 Series). General issues 1.01.
How do I connect my touch screen controller to
my PC
Answers Carefully
connect the Touch Screen Controller to your PC as shown below. Ensure
that your touch screen is properly connected to the Touch Screen Controller.
Download the TouchKit software for your preferred operating system. Double click setup.exe to begin the installation. The installation process will now begin. Click Next to continue....
When the Setup Type screen appears, do not check the PS/2 interface driver box as this is not required for your serial touch screen controller. Click on Next to continue....
If you wish to run 4 point calibration utility every system boot up or next system boot up, then select the appropriate box below. Otherwise, leave it at None by default. Click on Next to continue....
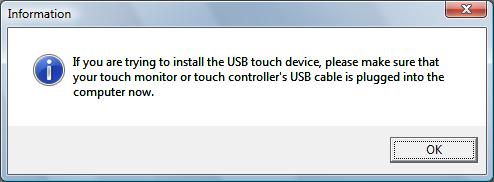
The message will appear informing you to connect your touch monitor or touch controller to USB/RS232 serial port on your PC. Please make sure that all connectors are securely fastened to your touch screen and PC, then press OK to continue....
If you wish to enable Multi-Monitor System Support utility, then select the box below however the installation of this utility is not covered by this tutorial. Click on Next to continue....
Choose the destination folder where the software will be installed. The default location is C:\Program Files\TouchKit, otherwise select Browse to change the destination folder.
Choose the folder to which the program icons will be added. The default folder is TouchKit. Click Next to continue the installation..
During installation the TouchKit software will automatically search all available COM ports for Touch Screen Controllers. If touch screen controller has been detected on any COM port, it will be automatically registered with the TouchKit software. If the software does not find a touch screen controller, the most likely cause is that the serial cable is not connected to your PC. After all COM ports have been searched for Touch Screen Controllers and TouchKit drivers are installed, the following screen below will be displayed. If you wish to run 4 Points Calibration utility, then select Yes and refer to the Answer 1.03 below for further instructions on how to calibrate the touch screen, otherwise click No. It is recommended that you restart your computer after successful installation of TouchKit software.
1.03. How do I calibrate the touch screen To begin the calibration process... Either select Windows Start Menu/TouchKit/Configure Utility as shown below.
or click on the TouchKit icon on your desktop This will activate the TouchKit calibration software and the screen shown below will be displayed..
Switch to the Tools tab and click on the 4 Points Calibration button shown below.
The calibration screen will appear on your monitor as below..
Starting at the bottom left hand side of the screen, the calibration software will place a number of flashing red crosses on the screen. Touch the flashing crosses with your finger as they appear, keep your finger on the screen until the cross stops flashing ( do not use a mouse to select the crosses ). The cross will then turn green to confirm your finger touch has been registered. Repeat this process for bottom right, top right and top left crosses. When the calibration process is complete, calibration data will be saved to the hard disc and the software will return to the TouchKit/Tools tab shown below. Press OK to continue.
The first step in troubleshooting a touchscreen system is to determine whether the problem is related to the display, software, or hardware:
1.05. My touch screen doesn't work correctly Connections. Ensure that all connectors are securely fastened to your touch screen and PC (refer to Answer 1.01 above). Select Start Menu/TouchKit/Configure Utility to bring up the TouchKit interface. Ensure the General tab is selected and that a touch screen controller is listed in the Installed Touchscreen Controllers list. If no controller is present, select Add to search for your touch controller. When a controller is found, ensure the number of the COM port listed matches the COM port you have connected the touch screen controller to. If no controller can be found, check cable connections.
Ensure the Hardware tab is selected and that a touch screen controller is listed in the Controller Model. Do not worry if the entries in the Controller Model and Firmware Version are not the same as yours as this can vary depending on the model purchased.
TouchKit Software. To successfully
install the TouchKit drivers on a Windows 2000, XP or Vista machine,
please ensure your are logged on as the ADMINISTRATOR or have administrator
privileges with your current login.
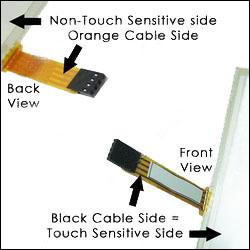
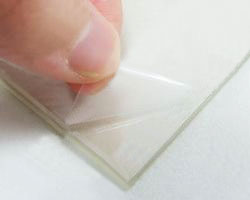
Touch Sensitive Side. If the TouchKit software crashes when running 4 Points Calibration utility and no touch locations are detected, please ensure you're touching the touch sensitive side of the touch panel. The touch sensitive side is the side with the thin ITO Film layer. It is also marked with Touch Side label.
If the touch screen works but is inaccurate, the touch screen requires calibration. Select Start Menu/TouchKit/Configure Utility to bring up the TouchKit interface. Ensure the Tools tab is selected. Select 4 Points Calibration as shown below. Touch the calibration targets in turn as instructed (refer to Answer 1.03 above). Do not rest your hand on the touch screen when touching the calibration targets. Do not touch the screen while the TouchKit software saves the calibration data.
For superfine calibration switch to Settings tab and select the 25 Points option shown below, then click Apply..
Now switch to Tools tab and click the Linearization button shown below....
The software will present a 25 target screen for more consistent accuracy across the whole area of the touch screen as below. Touch each target in turn as directed. Do not rest your hand on the touch screen when touching the calibration targets. Do not touch the screen while the TouchKit software saves the calibration data.
If all
fails ! 1. No response to the touch.
2. The touch position is not accurate.
3. The touch position is accurate in most areas, but off a lot in certain area(s).
4. The cursor keeps jumping ("jumpy pointer") to certain area(s) or is stuck there.
Specification subject to change without notice.
Copyright © 2021 TVI Electronics, LLC. |